In the rapidly expanding world of the Internet of Things (IoT), the ability to securely and efficiently manage remote devices is paramount. Among the myriad of single-board computers, the Raspberry Pi stands out as a versatile, cost-effective, and powerful platform for IoT projects. However, deploying a Raspberry Pi as an IoT device often means it will operate headless—without a monitor, keyboard, or mouse—in a remote location. This is where the power of Secure Shell (SSH) comes into play, transforming how we interact with and control our remote IoT devices, specifically the Raspberry Pi.
SSH provides an encrypted communication channel that allows you to execute commands, transfer files, and even forward graphical applications from your local machine to a remote Raspberry Pi, regardless of its physical location. This article delves deep into the nuances of using SSH for managing your Raspberry Pi-based IoT devices, offering practical insights, troubleshooting tips, and best practices to ensure a seamless and secure remote management experience.
Table of Contents
- Understanding SSH: The Backbone of Remote IoT Management
- Initial Setup: Enabling SSH on Your Raspberry Pi
- The Power of SSH Keys for Unbreakable Security
- Mastering the SSH Config File for Seamless Connections
- Common SSH Connection Issues and Troubleshooting
- X11 Forwarding: Running Graphical Applications Remotely
- Security Best Practices for Your SSH Remote IoT Device Raspberry Pi
- Conclusion: Empowering Your IoT Journey with SSH
Understanding SSH: The Backbone of Remote IoT Management
SSH, or Secure Shell, is a cryptographic network protocol that enables secure data communication between two networked devices. For anyone working with an **SSH remote IoT device Raspberry Pi**, understanding SSH is foundational. It provides a secure channel over an unsecured network by using strong encryption. This means that when you connect to your Raspberry Pi via SSH, all your data, including commands and passwords, are encrypted, protecting them from eavesdropping and tampering. This level of security is crucial for IoT devices, which often operate in environments where physical security cannot be guaranteed.
- Wasmo Somali Muqdisho Telegram 2025
- Aditi Mistry Nip Slip Live
- Lara With Horse
- Sotwe Xxx Kannada
- Camilla Araujo Leak
Beyond simple command-line access, SSH offers a suite of powerful features, including secure file transfer (SFTP/SCP), port forwarding, and X11 forwarding, which allows you to run graphical applications from your remote Raspberry Pi on your local desktop. The versatility of SSH makes it an indispensable tool for managing, monitoring, and debugging your IoT deployments, ensuring that your Raspberry Pi remains accessible and controllable, no matter where it is located.
Initial Setup: Enabling SSH on Your Raspberry Pi
Before you can harness the power of SSH, you need to ensure it's enabled on your Raspberry Pi. Modern Raspberry Pi OS images often have SSH disabled by default for security reasons. There are several straightforward ways to enable it:
- Via Raspberry Pi Configuration Tool (Graphical Interface):
- If you have a monitor connected, boot your Raspberry Pi, go to Menu > Preferences > Raspberry Pi Configuration.
- Navigate to the "Interfaces" tab and ensure "SSH" is enabled.
- Click "OK" and reboot if prompted.
- Via `raspi-config` (Command Line):
- Open a terminal on your Raspberry Pi (or connect via keyboard/monitor).
- Type `sudo raspi-config` and press Enter.
- Navigate to "Interface Options" > "SSH".
- Select "Yes" to enable the SSH server.
- Select "Finish" and reboot if prompted.
- Headless Setup (Before First Boot):
- This is particularly useful for an **SSH remote IoT device Raspberry Pi** that will be deployed without direct access.
- After flashing your Raspberry Pi OS image to an SD card, but before inserting it into the Pi, mount the `boot` partition on your computer.
- Create an empty file named `ssh` (no extension) in the root directory of the `boot` partition. For example, on Linux/macOS, `touch /Volumes/boot/ssh`. On Windows, simply create a new text file and save it as `ssh` (ensure file extensions are visible and there's no `.txt` extension).
- When the Raspberry Pi boots with this SD card, it will detect the `ssh` file and automatically enable the SSH server.
Once SSH is enabled, you can attempt to connect from your local machine. The basic command is `ssh username@ip_address`. For instance, if your Raspberry Pi's IP address is `192.168.1.100` and the default username is `pi`, you would type: `ssh pi@192.168.1.100`.
The Power of SSH Keys for Unbreakable Security
While password-based SSH authentication is convenient, it's significantly less secure than using SSH keys. For an **SSH remote IoT device Raspberry Pi**, where security is paramount, SSH keys are the gold standard. They provide a much stronger authentication mechanism, eliminating the risk of brute-force attacks against your password.
An SSH key pair consists of two parts: a private key and a public key. The private key remains securely on your local machine and should never be shared. The public key is placed on the remote Raspberry Pi. When you attempt to connect, your local SSH client uses your private key to prove your identity to the remote server, which verifies it against the public key. This handshake happens automatically and is far more secure than typing a password.
Generating and Deploying SSH Keys
To generate an SSH key pair on your local machine (Linux, macOS, or Windows with OpenSSH):
ssh-keygen -t rsa -b 4096 -C "your_email@example.com" This command will prompt you to choose a location to save the keys (default is `~/.ssh/id_rsa` and `~/.ssh/id_rsa.pub`) and to set a passphrase. While optional, a strong passphrase adds an extra layer of security to your private key. If you are creating a bash script from server 1 that will execute some commands on server 2 via SSH, you might consider an empty passphrase for automation, but be aware of the security implications.
Once generated, you need to copy your public key to your Raspberry Pi. The easiest way is using `ssh-copy-id`:
ssh-copy-id pi@your_raspberry_pi_ip This command will securely copy your public key (`id_rsa.pub`) to the `~/.ssh/authorized_keys` file on your Raspberry Pi. If `ssh-copy-id` is not available or you prefer to do it manually:
cat ~/.ssh/id_rsa.pub | ssh pi@your_raspberry_pi_ip "mkdir -p ~/.ssh && chmod 700 ~/.ssh && cat >> ~/.ssh/authorized_keys && chmod 600 ~/.ssh/authorized_keys" After successfully deploying the key, you should be able to connect to your Raspberry Pi without a password. If you encounter issues, ensure correct file permissions (`~/.ssh` should be `700`, and `authorized_keys` should be `600` on the Raspberry Pi).
Automating Git Interactions with SSH Keys
The convenience of SSH keys extends beyond direct server access. One common scenario for an **SSH remote IoT device Raspberry Pi** is managing code deployments or pulling updates from a version control system like Git. As one user noted, "When I do git pull via the command line, it always asks for my GitHub username and password. I'd like to tell it to use the SSH key in GitHub, and never have to worry about it again."
This is precisely where SSH keys shine. By adding your public SSH key to your GitHub (or GitLab, Bitbucket) account, you can authenticate Git operations without repeatedly entering your credentials. When cloning a repository, use the SSH URL (e.g., `git@github.com:your_username/your_repo.git`) instead of the HTTPS URL. Git will then automatically use your SSH key for authentication, streamlining your development and deployment workflow on your remote IoT devices.
Mastering the SSH Config File for Seamless Connections
For anyone regularly interacting with multiple remote servers or complex SSH setups, the `~/.ssh/config` file is an invaluable tool. This client-side configuration file allows you to define custom settings for each host you connect to, simplifying your SSH commands and automating various parameters. It addresses common frustrations, such as remembering specific IP addresses, usernames, ports, or even which private key to use.
As one user pondered, "How do I set the host name and port in a config file for Windows, using OpenSSH through PowerShell?" The answer lies in this powerful file. You can "Edit or create the file now by typing" `notepad ~/.ssh/config` on Windows or `nano ~/.ssh/config` on Linux/macOS. If the `~/.ssh` directory doesn't exist, create it (`mkdir ~/.ssh`).
Here’s an example of how you might configure your Raspberry Pi in the `~/.ssh/config` file:
Host my_iot_pi Hostname 192.168.1.100 User pi Port 22 IdentityFile ~/.ssh/id_rsa_iot_pi ForwardAgent yes # Additional settings for X11 forwarding ForwardX11 yes ForwardX11Trusted yes With this configuration, instead of typing `ssh pi@192.168.1.100`, you can simply type `ssh my_iot_pi`. This makes managing your **SSH remote IoT device Raspberry Pi** much more intuitive and less prone to errors. You can specify a custom `IdentityFile` if you use different SSH keys for different devices, ensuring that "the documentation is not clear on how to explicitly use only that key" becomes a non-issue.
Configuring SSH on Windows with OpenSSH and PowerShell
The experience of using SSH on Windows has significantly improved with the integration of OpenSSH. To set up your `~/.ssh/config` file on Windows for an **SSH remote IoT device Raspberry Pi** using PowerShell:
- Open PowerShell.
- Navigate to your user directory: `cd ~` (or `cd $env:USERPROFILE`).
- Create the `.ssh` directory if it doesn't exist: `mkdir .ssh`.
- Create or open the config file: `notepad .\.ssh\config`.
- Add your host configurations as shown in the example above.
- Save the file.
This allows Windows users to enjoy the same streamlined SSH experience as Linux/macOS users, making remote management of Raspberry Pi devices seamless across platforms. For specific scenarios like connecting to GitHub on a non-standard port, the `config` file is indispensable. As someone discovered, "Host github.com hostname ssh.github.com port 443 finally, I found" the solution within this file, demonstrating its power for diverse connection needs.
Advanced SSH Config for Multi-Server Automation
For more complex IoT deployments involving multiple Raspberry Pis or other servers, the `~/.ssh/config` file becomes even more critical. Consider a scenario where "I would be creating a bash script from server 1 that will execute some commands on server 2 via SSH." This requires server 1 to connect to server 2 using a private key file. You can define this in your `config` file on server 1:
Host server2_iot Hostname 192.168.1.200 User automation_user IdentityFile ~/.ssh/server1_to_server2_key StrictHostKeyChecking no # Use with caution for automation, understand risks This setup allows your bash script on `server1` to simply call `ssh server2_iot "command_to_execute"`, automatically using the specified private key. This level of configuration is essential for robust automation in IoT ecosystems, ensuring secure and efficient inter-device communication.
Common SSH Connection Issues and Troubleshooting
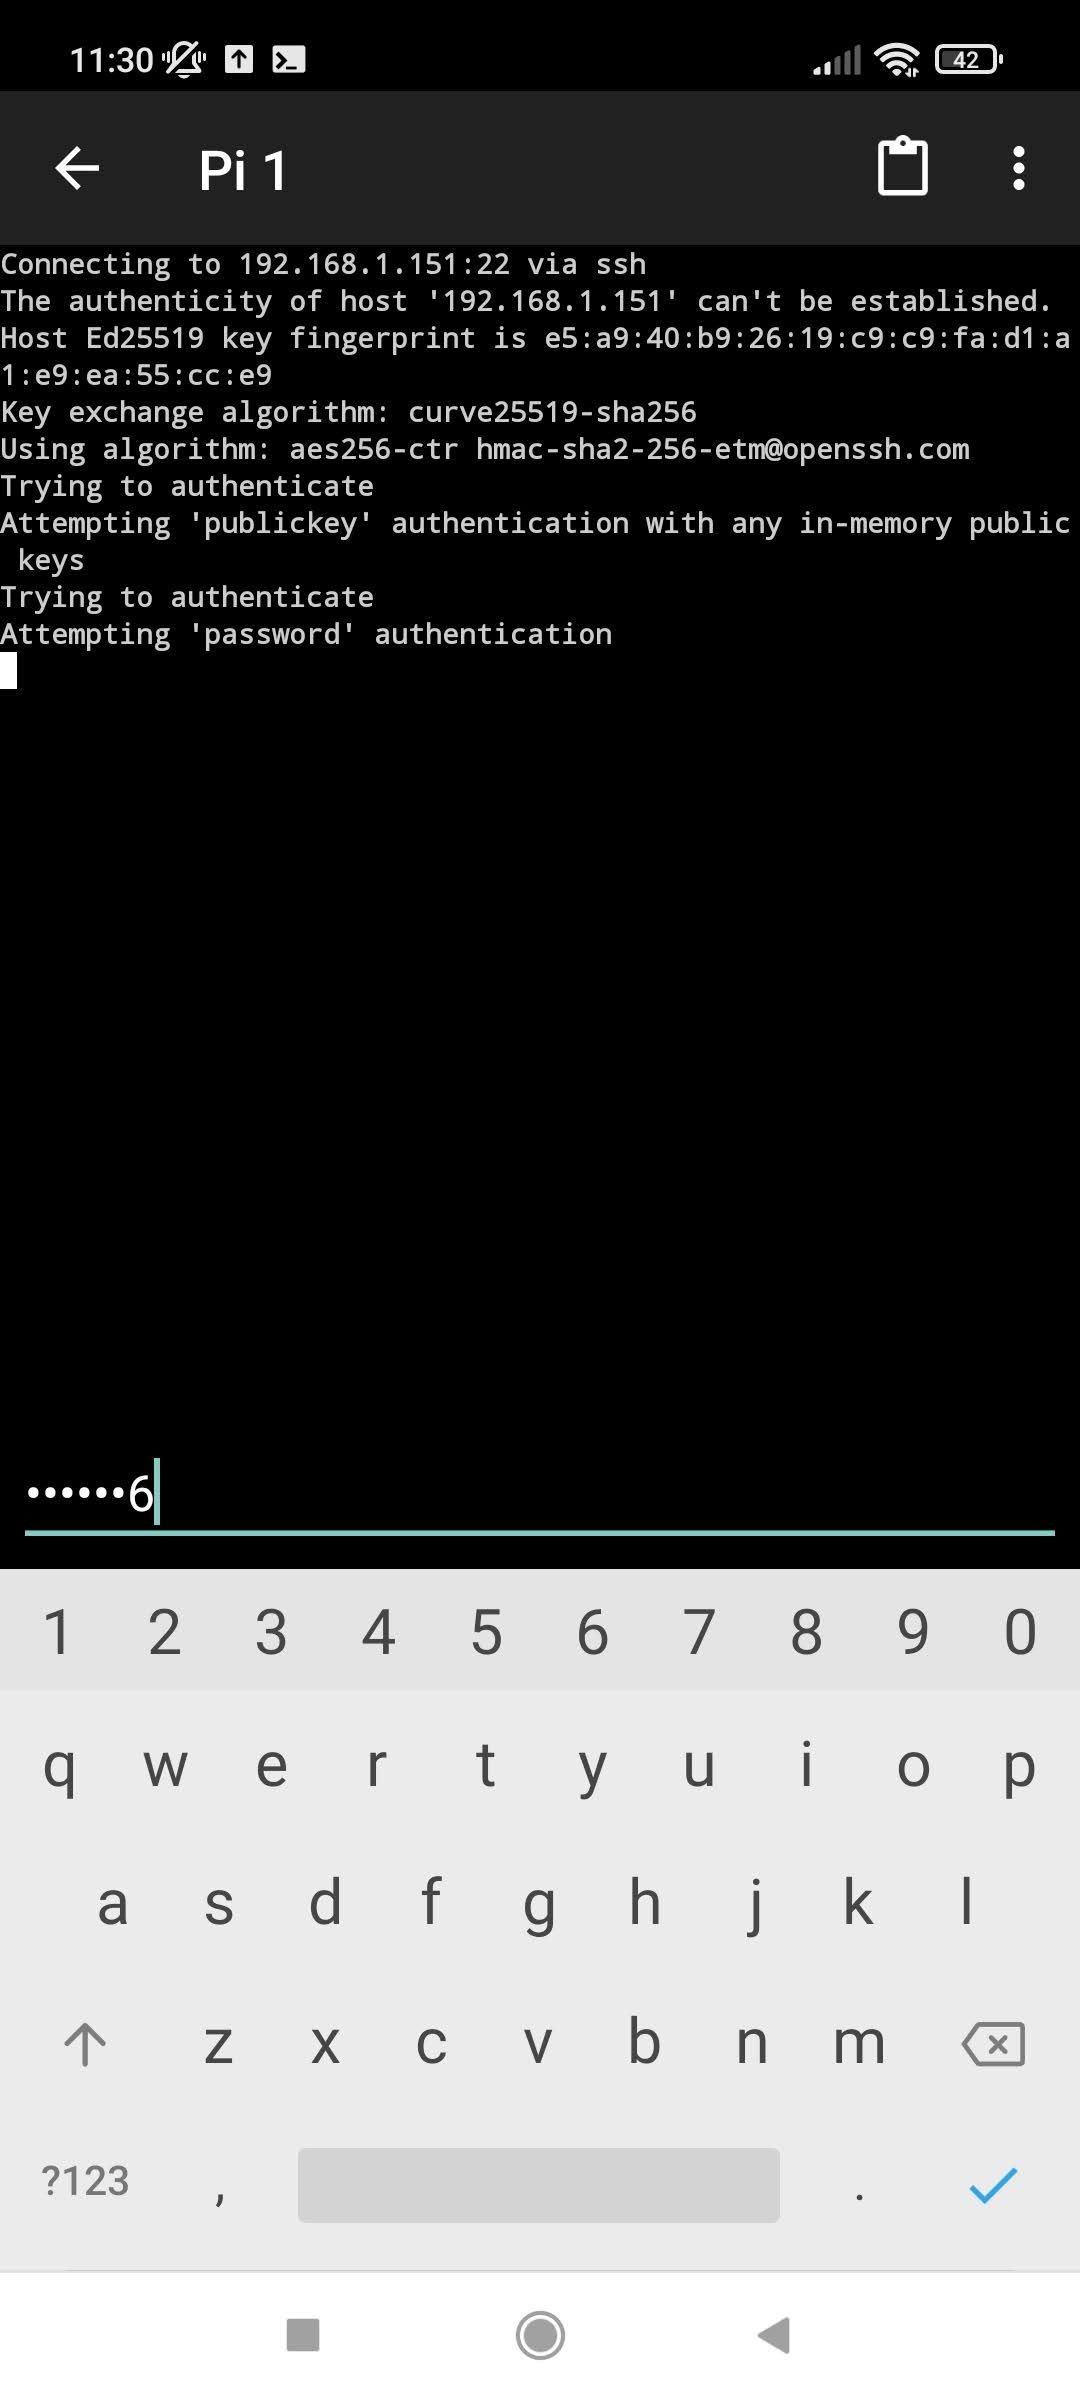
Even with careful setup, you might encounter issues when trying to connect to your **SSH remote IoT device Raspberry Pi**. "I am trying to ssh login to my remote server, but whenever I try to login through terminal using ssh command, Ssh root@{ip_address} I get error, Connection closed by {ip_address} I checked hosts." This is a common problem with several potential causes:
- Incorrect IP Address or Port: Double-check the Raspberry Pi's IP address and ensure SSH is listening on the default port 22 (or your custom port).
- SSH Server Not Running: Confirm the SSH service (`sshd`) is active on the Raspberry Pi. You can check its status with `sudo systemctl status ssh` on the Pi itself.
- Firewall Blocking Connection: A firewall on your local machine, the Raspberry Pi, or your network router might be blocking SSH traffic. Ensure port 22 (or your custom port) is open.
- Incorrect Username or Password/Key: Verify the username (e.g., `pi` for default Raspberry Pi OS) and ensure you're using the correct password or that your SSH key is properly installed and permissions are correct on both ends.
- Host Key Mismatch: If the remote host's public key changes (e.g., after reinstalling the OS on the Pi), your SSH client will warn you about a potential man-in-the-middle attack. You'll see a message like "WARNING: REMOTE HOST IDENTIFICATION HAS CHANGED!". You'll need to remove the old entry from your `~/.ssh/known_hosts` file. The "fingerprint is based on the host's public key, usually based on the `/etc/ssh/ssh_host_rsa_key.pub` file. Generally, it's for easy identification/verification of the host."
- Permission Issues on Raspberry Pi: Incorrect permissions on `~/.ssh` (`700`) or `~/.ssh/authorized_keys` (`600`) on the Raspberry Pi can prevent key-based authentication.
- Root Login Disabled: By default, direct SSH login as `root` is often disabled for security. It's best practice to log in as a regular user (e.g., `pi`) and then use `sudo` for administrative tasks.
To diagnose, use the verbose option with your SSH command: `ssh -v pi@your_raspberry_pi_ip`. This will provide detailed output, helping you pinpoint the exact stage where the connection fails. "What is interesting there is the line" containing the error message, which often provides clues for resolution.
X11 Forwarding: Running Graphical Applications Remotely
While most IoT applications run headless, there are times when you might need to interact with a graphical application or desktop environment on your **SSH remote IoT device Raspberry Pi**. SSH's X11 forwarding feature makes this possible. It securely tunnels X Window System traffic over the SSH connection, allowing you to display remote graphical applications on your local machine's screen.
To enable X11 forwarding, use the `-X` flag with your SSH command:
ssh -X pi@your_raspberry_pi_ip Alternatively, you can configure it in your `~/.ssh/config` file by adding `ForwardX11 yes` and `ForwardX11Trusted yes` (as shown in the example above). Once connected, you can simply type the name of a graphical application (e.g., `chromium-browser` or `lxterminal`) and it will appear on your local desktop.
However, you might encounter issues where "If you run ssh and display is not set, it means ssh is not forwarding the x11 connection." To confirm that SSH is forwarding X11, check for a line containing "requesting X11 forwarding" in the output of `ssh -v` (verbose mode). If it's not there, ensure X11 forwarding is enabled in your client configuration and that the X server is running on your local machine (e.g., XQuartz on macOS, Xming/VcXsrv on Windows).
Sometimes, you might also see references to variables like `DISPLAY`. As one user noted, "This variable sounds like what I am looking for, but it is not defined." When X11 forwarding is active, SSH automatically sets the `DISPLAY` environment variable on the remote server to point back to your local X server. You typically don't need to set it manually unless you are troubleshooting a very specific, non-standard setup.
Security Best Practices for Your SSH Remote IoT Device Raspberry Pi
Given that your Raspberry Pi is an **SSH remote IoT device Raspberry Pi**, security cannot be overstated. Adhering to best practices is crucial to protect your device and network from unauthorized access:
- Use SSH Keys (Mandatory): As discussed, always prefer SSH key-based authentication over passwords. Disable password authentication in `/etc/ssh/sshd_config` on your Raspberry Pi by setting `PasswordAuthentication no`.
- Change Default Credentials: Immediately change the default `pi` user password on your Raspberry Pi. Consider creating a new user with `sudo` privileges and disabling the `pi` user if it's not needed.
- Disable Root Login: Ensure `PermitRootLogin no` is set in `/etc/ssh/sshd_config` to prevent direct root access via SSH.
- Change Default SSH Port: Instead of the default port 22, change SSH to listen on a non-standard port (e.g., 2222). This won't stop a determined attacker but will significantly reduce automated scanning attempts. Modify `Port 22` to `Port 2222` in `/etc/ssh/sshd_config`.
- Implement a Firewall: Configure `ufw` (Uncomplicated Firewall) on your Raspberry Pi to only allow SSH connections from trusted IP addresses or networks. For example, `sudo ufw allow from your_ip_address to any port 2222`.
- Keep Software Updated: Regularly update your Raspberry Pi OS and all installed software using `sudo apt update && sudo apt upgrade`. This ensures you have the latest security patches.
- Monitor Logs: Periodically check SSH logs (`/var/log/auth.log`) for suspicious login attempts.
- Use Fail2Ban: Install Fail2Ban to automatically ban IP addresses that show malicious signs, such as too many failed login attempts.
- Avoid Public Key Re-use: While convenient, using the same SSH key for multiple devices or services (like GitHub and your Raspberry Pi) can increase risk. Consider generating unique keys for critical systems.
By implementing these measures, you significantly harden your **SSH remote IoT device Raspberry Pi**, making it much more resilient against cyber threats. Remember, an IoT device is only as secure as its weakest link.
Conclusion: Empowering Your IoT Journey with SSH
The journey of deploying and managing an **SSH remote IoT device Raspberry Pi** is filled with exciting possibilities. From simple home automation to complex industrial monitoring, the Raspberry Pi offers an accessible entry point into the world of IoT. SSH, with its robust security features and versatile functionalities, serves as the essential bridge that connects you to your remote devices, empowering you with full control and visibility from anywhere in the world.
We've explored the fundamental steps of enabling SSH, delved into the unparalleled security offered by SSH keys, and demystified the powerful `~/.ssh/config` file for streamlined connections. We've also addressed common troubleshooting scenarios and highlighted the importance of X11 forwarding for graphical interactions. Most importantly, we've emphasized a comprehensive set of security best practices to ensure your IoT deployments remain safe and resilient against evolving threats. "I was also following these instructions and was quite" successful in setting up my remote access, a testament to the clarity and effectiveness of these principles.
By embracing these techniques, you're not just connecting to a remote computer; you're unlocking the full potential of your IoT projects, allowing for seamless development, deployment, and maintenance. Whether you're a hobbyist or a professional, mastering SSH for your Raspberry Pi IoT devices is a skill that will undoubtedly prove invaluable. We encourage you to implement these strategies, experiment with the configurations, and share your experiences. What challenges have you faced, and what ingenious solutions have you devised for your **SSH remote IoT device Raspberry Pi**? Share your thoughts in the comments below, or explore our other articles on advanced Raspberry Pi projects and IoT security to further your knowledge!
Related Resources:


Detail Author:
- Name : Buford Monahan
- Username : ayana13
- Email : clementine34@hotmail.com
- Birthdate : 1997-06-24
- Address : 5793 Skiles Point New Kaia, NY 15234
- Phone : (770) 292-4305
- Company : Legros Inc
- Job : Materials Scientist
- Bio : Delectus harum iusto id dolores explicabo blanditiis ut. Qui sed aut voluptas tenetur assumenda sunt a sed. Natus tenetur asperiores eos dolores eum consequatur non nemo.
Socials
facebook:
- url : https://facebook.com/lillie_dickens
- username : lillie_dickens
- bio : Est facilis porro quibusdam nemo sed molestiae enim.
- followers : 3576
- following : 2445
linkedin:
- url : https://linkedin.com/in/lillie.dickens
- username : lillie.dickens
- bio : Qui occaecati rerum id omnis maxime qui.
- followers : 1434
- following : 760
